


The Magnificent Swallowtail Kite

made in USA
KnifeMaker Fingerprint 1 KnifeMaker Fingerprint 2 KnifeMaker Fingerprint 3
Customer's Personal Stencil Addition
Blue Lightning Tips Etch your logo into Damascus Etching Power Supply
Blue Lightning Stencil: Price List
Bowies page 1 Bowies page 2 Lockback Folders
Links Tutorials Stabilized Leather Moose Antler Stabilize
How to etch your Logo into your knife
HARD Felt Knife Honing Wheel Leather Stamp Custom Logo
Email: shrpknife@aol.com
POWER SUPPLY
The pictures below shows a handmade power supply that
I made for electro-etching my logo into my knife.
Power supply schematic is above ...left.
The case cover is removed to show the wiring. Case is 5" X 5.5".
Different size is your choice.
Click on the Power Supply schematic for a PDF of the Schematic.
Locate the needed parts at any local electronic supply store.
EXCELLENT Start-UP POWER SUPPLY
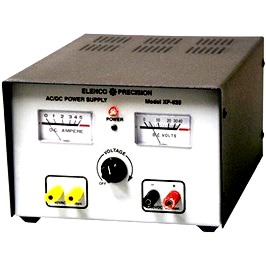
Power Supply Links :
http://www.esssales.com/elenco/power-supplies.html#xp-625
Schematic and instruction manual link
Chose the DC voltage output to suit your Logo. Change setting if you want to
POWER SUPPLY HAND MARKER
This Hand Marker will do the job and last you for years maybe a decade or two.
An advantage is if you want to change the size you can easily do it.
Make the tip section 1/4" larger than the logo you are etching into your knife.
The size allows you to firmly press down evenly across the entire logo.
There are many other Hand Markers to buy and use....make your own
This one will be custom made by you for you.
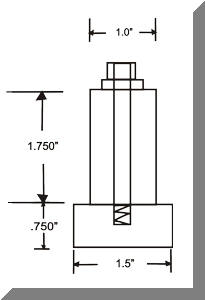
HAND MARKER SIZES
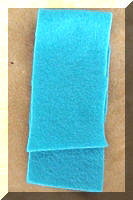
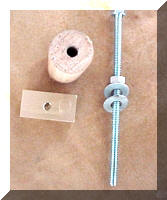
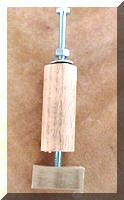
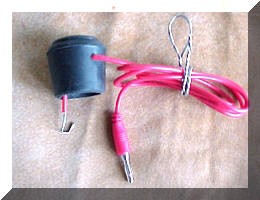
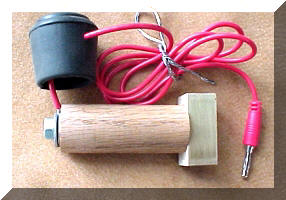
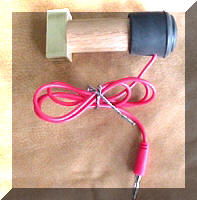
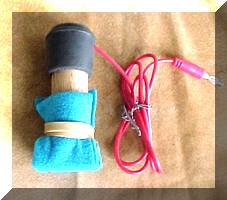
FINISHED
Step one Plus:
Assemble supplies. Felt from Jo-Ann Fabrics, 1/4 20 X 5"
stainless steel bolt from Home Depot, 1" round Oak stock,
from Home Depot, 1" Chair leg pad from Home Depot,
Brass Bar .750" X .750" X 1.5" from Sheffield's Knife Supply,
Rubber band from Office Max. The Marker brass is that size because
I test various size stencils. Cut Oak stock to desired length.
Drill 1/4" hole through center of Oak stock.
Drill and tap brass bar and do not go through the bar.
Place two washers and a 1/4 20 nut on the bolt. Pass the bolt through the Oak Stock and tighten it firmly.
Take your banana plug lead wire and tin it with solder. Drill the Chair leg cup just below
the hard tip section with a .125" drill bit. Do not run the bit in and out.
You want some rubber fiber left in the hole to better hold the wire,
bend the wire tip to go around the bolt and place it in between the washers
and firmly tighten the nut against the Oak stock.
Hack saw the top of the bolt off and clean it up with your belt grinder.
Place the cup over the nut, washers and wire.
Press it firmly against a hard surface to make sure it's all the way down.
Shape the wood as you prefer. Take a long strip of felt and fold it.
Place it over the brass tip. Fasten with a rubber band. You're ready to etch.
To clean brass after etching just remove the felt and scrape the end
of the brass bar across a piece of 220 grit sandpaper that is firmly supported.
Here is the Video link on how to etch your Logo into your Knife

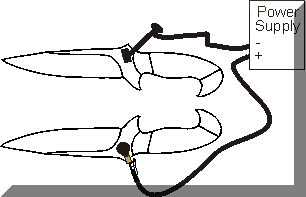
Directions to use the Blue Lightning Custom power supply magnet button.
It is Handmade from Neodymium Rare Earth Magnet.
The center contact pin is a copper burr pin soldered to the
contact terminal.
The Blue Lightning power supply magnet
button
allows you to more easily position
the positive/plus voltage lead to the blade
any part of the blade you want to have contact with.
The BEST part is directly below on the opposite side of the blade.
This gives a direct path for current flow.
It also allows you to use the Alligator clip if you are etching
non/low carbon metal...nickel,
brass, aluminum etc.
To use, insert the small side of the
Alligator jaw clip
(attached to the power supply lead line)
into the Blue Lightning Magnet button and place
it on the blade
wherever you want .
Proceed with your Logo etching steps.
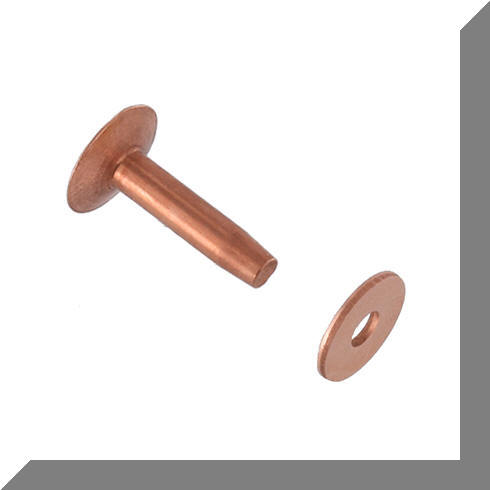
The center of the two rare earth magnets is held together by the copper burr rivet.
This type of copper rivet is available at any leathercraft supply store.
NEW MAGNET CONTACT BUTTON .... HOMEMADE !
It works excellent !!
TITANIUM ETCH SAMPLE
The etch is better on the Titanium than in the picture.

TITANIUM MIL - T9046 CP-1
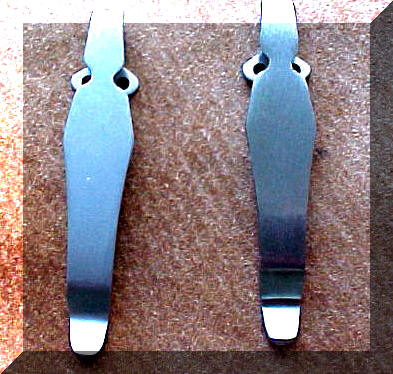
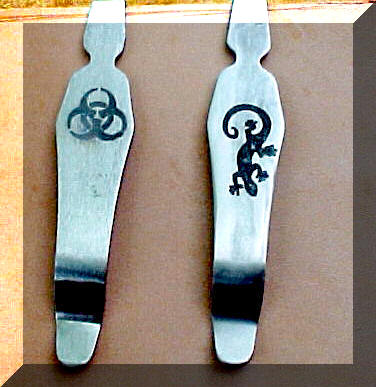
Below is Titanium ( 5.6 AL4V0 ) Knife Clips etched with Logo
The etched Logo was not cleaned up for anodizing step
Test Clips....excellent etch !
ETCH BLOCKER
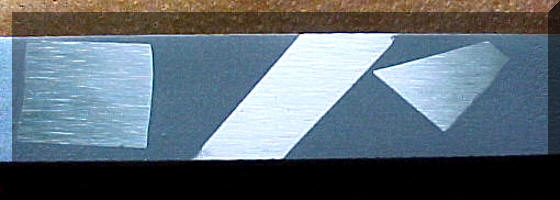
The Etch Blocker was used here to block an area from being sandblasted.
The patterns were just cut with sharp scissors.
The Etch Blocker is placed on the steel with straight down high pressure...push it down firmly.
The protected area was sanded finely but could be mirror polished before sandblasting.
The Etch Blocker pattern can easily be more intricate.
The steel is 416 SS and was sandblasted straight down with regular sand at 80 lbs.
The Etch Blocker can also be used when you etch Damascus.
After sandblasting remove the Etch Blocker and line up your logo and etch it into your steel
A short picture tutorial is on this web page....DAMASCUS...
SAMPLE GOLD INLAY
This is stainless steel finished with 800 grit sandpaper and
the dark background is just a reflection.
PROUDLY SERVING THE WORLD

ALABAMA, ALASKA, ARIZONA, ARKANSAS, AUSTRIA, AUSTRALIA, BELGIUM, Brazil, BULGARIA,
CALIFORNIA, CANADA, CZECH REPUBLIC, COLORADO, CONNECTICUT, Costa Rico, CROATIA.
DELAWARE, ENGLAND, FLORIDA, FRANCE, GEORGIA, GREECE,
HAWAII, ICELAND, IDAHO, ILLINOIS, INDIANA, IOWA, IRELAND, ISRAEL, JAPAN, KANSAS, KENTUCKY,
LOUISIANNA MAINE, MARYLAND, MASSACHUSETTS, MICHIGAN, MINNESOTA, MISSISSIPPI, MISSOURI, MONTANA,
NEBRASKA, NETHERLANDS, NEVADA, NEW HAMPSHIRE, NEW JERSEY, NEW MEXICO, NEW SOUTH WALES,
NEW YORK, NEW ZEALAND, NORTH CAROLINA, NOVA SCOTIA,
OHIO, OKLAHOMA, OREGON, PENNSYLVANIA, RHODE ISLAND, PORTUGAL,
SCOTLAND, SINGAPORE, SOUTH CAROLINA, SOUTH DAKOTA, SWEDEN, SWITZERLAND, THAILAND,
TASMANIA, TENNESSEE, TEXAS, UNITED KINGDOM, UTAH, VIRGINIA, WALES,
WASHINGTON, WEST VIRGINIA, WISCONSIN, and WYOMING.